Tutorial
Make Phone Calls to Fill a Shift
- Open the Entered Shifts - Calendar View, if it is not already open,
by pressing F2.
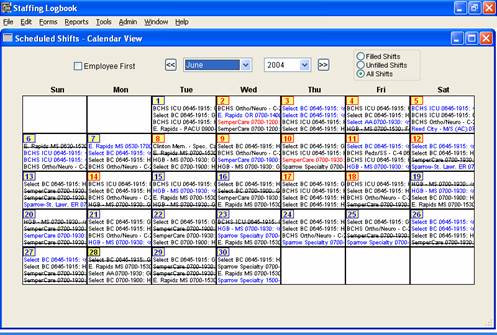
- Go to the desired month and year using the controls at the top of the form. Click on the day where the shift
appears to go to the Day Detail form. Click on the shift to go to the Edit Shift form. Click on Call Activity
to go to the Call Center.
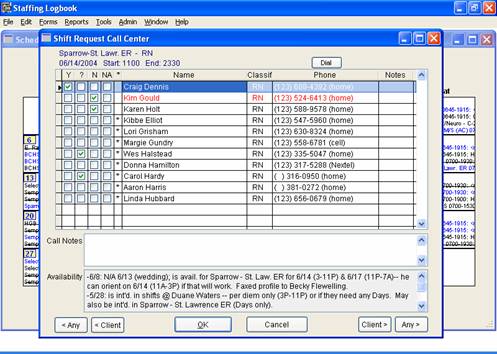
- On the Shift Request Call Center form, you see the employees that:
- Have the skills needed.
- Are listed as able to work for this client.
- See employees in red that have a scheduling conflict working this shift.
To the right side of the list, there is a Phone number column, with a Dial button above the column heading.
If you click on a personĺs phone number, a drop-down list opens up.
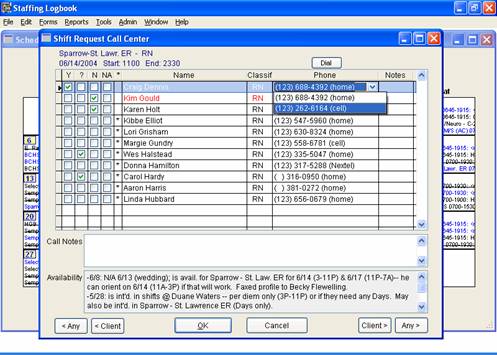
- This is the list of phone numbers that were entered for that person on the Employee form, Details tab. Select the
phone number that you wish to dial, and click on the Dial button above.
- To the left of each name, there are four check boxes, labeled Y, ?, N, and NA. They have the following meanings:
- Y : Yes, the person wants to take the shift.
- ? : The person is not sure if they can take the shift.
- N : No, the person cannot take the shift.
- NA : Not available.
There is a column to the right of the checkboxes, labeled ‘*’. A ‘*’ mark appears in this column if the person has never worked for the client before. People that havenĺt worked for a client before appear sorted at the end of the list.
- Below the grid of names are two additional fields:
- Call Notes - Enter any special information regarding this shift here.
- Availability - This field displays any availability notes that exist
for the selected person, that have been entered into the Employee form, Details tab.
- At the bottom of the Call Center form, on the left and right sides, are buttons labeled ‘Any’ and ‘Client’.
Use these buttons to scroll to other unfilled shifts. The Client buttons scroll through unfilled shifts for
the given client; the Any buttons scroll through unfilled shifts for any client. The buttons on the left side
move through shifts for earlier dates (occurring before the currently displayed shift); the buttons on the right
side take you to shifts for later dates (occurring after the currently displayed shift). If you check the ‘Y’ box for a person, it is considered filled. If you scroll to another shift, the state of the current shiftĺs checkboxes
are automatically saved.
- When finished, click Ok. If a person has been marked ‘Y’, their name is pulled back into the Edit Shift form as the person working that shift.
Back to How It Works menu | Next..Edit an Employee
|